Automate Accounts for Azure AD
Azure AD's B2B capability is a really powerful way to leverage identities from outside of an organization, but is it the right solution for seasonal, temporary, or white listed employees? Maybe, maybe not, and if not then the creation of cloud only accounts may require a time consuming (possibly manual) request \> approval \> provision process.
Recently I had a customer that asked how we could automate an account provisioning processes that allow for a request, an approval workflow, automated account provisioning, association of the account with a ‘manager’, an automated actions if the ‘manager’ departed, and time boxing of the account. In order to minimize development and utilize as much Out of the Box as I could I turned to Flow.
Start with SharePoint
So this is the benefit of experience: I actually started with Flow and discovered the template for Flow, SharePoint, and Azure AD. Because I started with Flow I didn’t think about what data I wanted to capture first, I just wanted to get accounts creating and would add fields as I needed them. This lead to some issues, probably because I’m impatient, between adding field and having those available in Flow. Therefore, I recommend YOU think about the information you need to capture from a user, build your SharePoint list and then proceed.
I decided that I would create a new site for tracking requests and host my request list in this location. In a real world environment this would allow an organization to have a single account request location which I viewed as valuable.
I created a list as shown below (Title will be used as the last name)

All fields are Single Line of Text except for Review Status which is a Choice field with Pending, Approved, Rejected as the options with Pending as the Default value.
Create your workflow with Flow
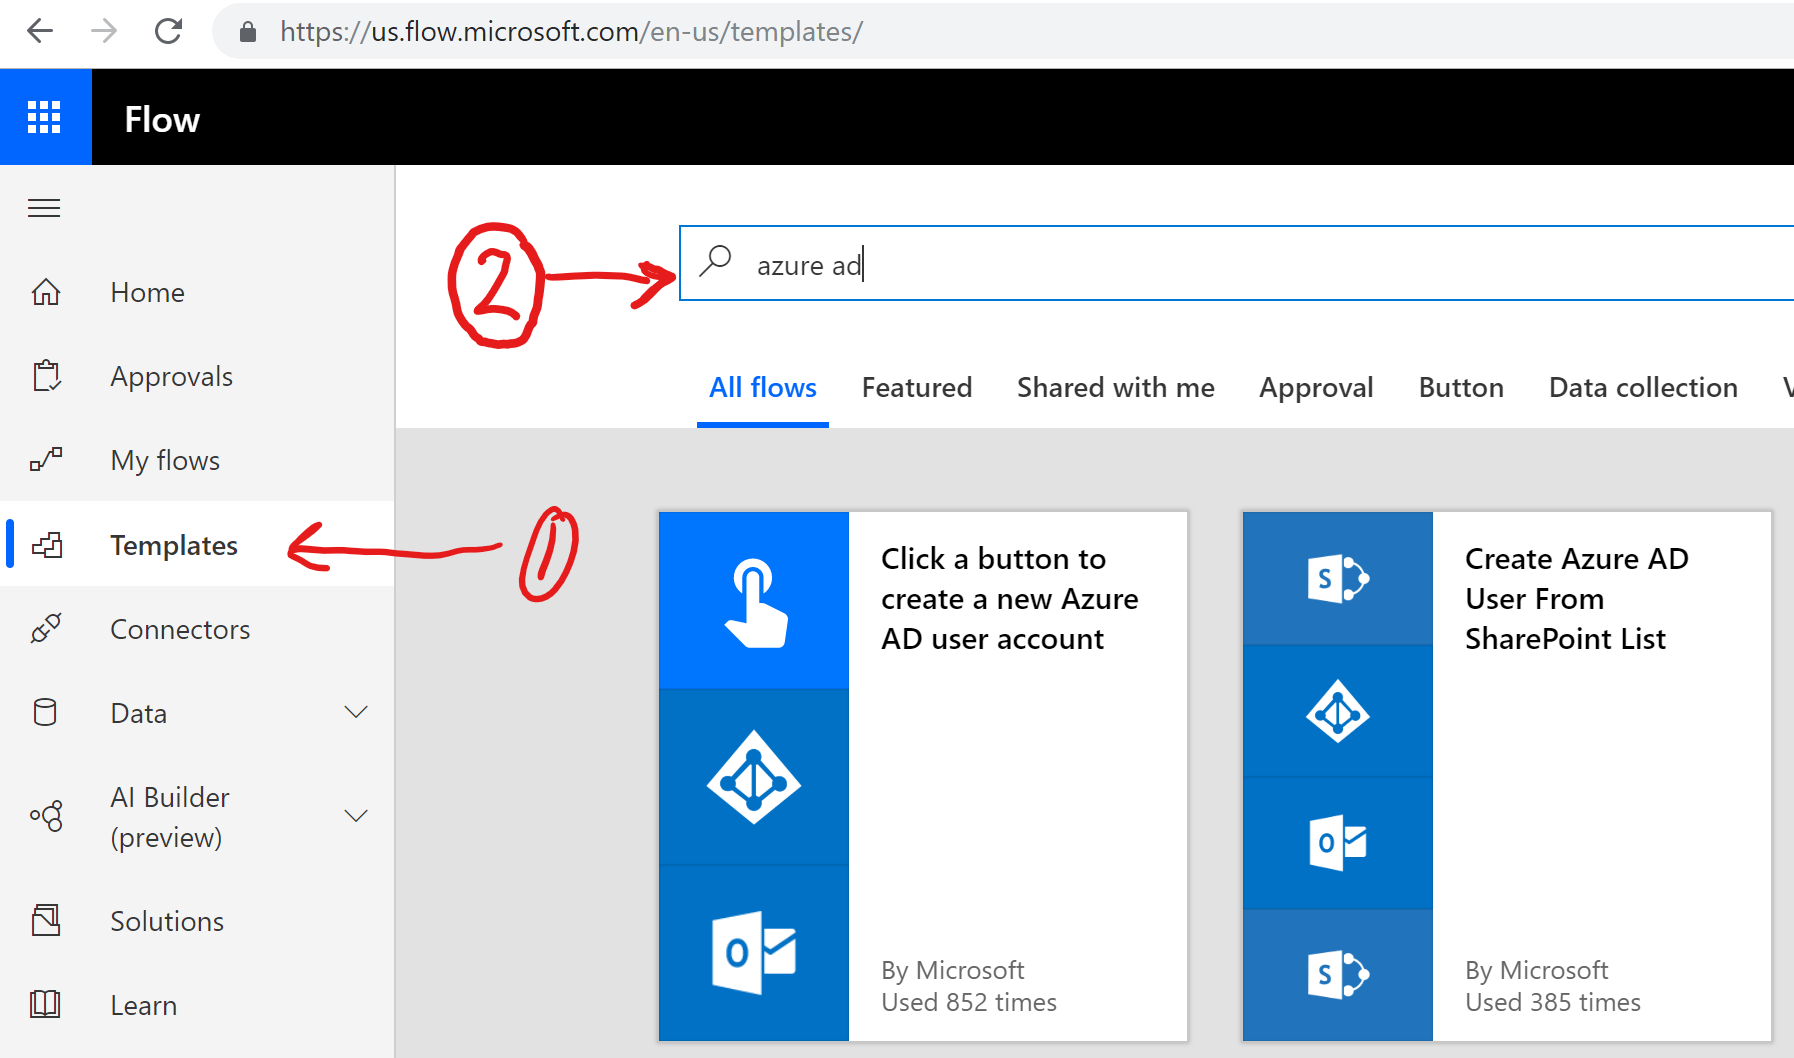
I am by no means a Flow expert, thanks to this demo I learned a little bit, but I really needed a simple place to start. Fortunately, if you go to Flow select Templates and Search for Azure AD the second template is Create Azure AD User from SharePoint List.
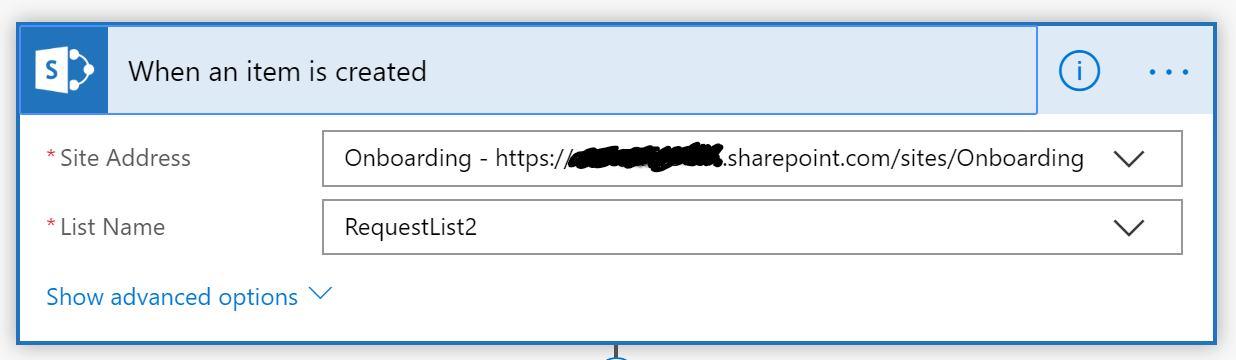
Once the flow is generated you need to update the first action with your SharePoint site Url and list name.
You can skip the second action as this will generate a random password for the account.
Next, you need to update the Create User step based on the fields you created in your list. You can also use Expressions to customize the values you want to use when creating the user. For example I use the following to create a username:
concat(triggerbody()['FirstName'], '.', triggerbody()['Title'], '@mydomain.com')
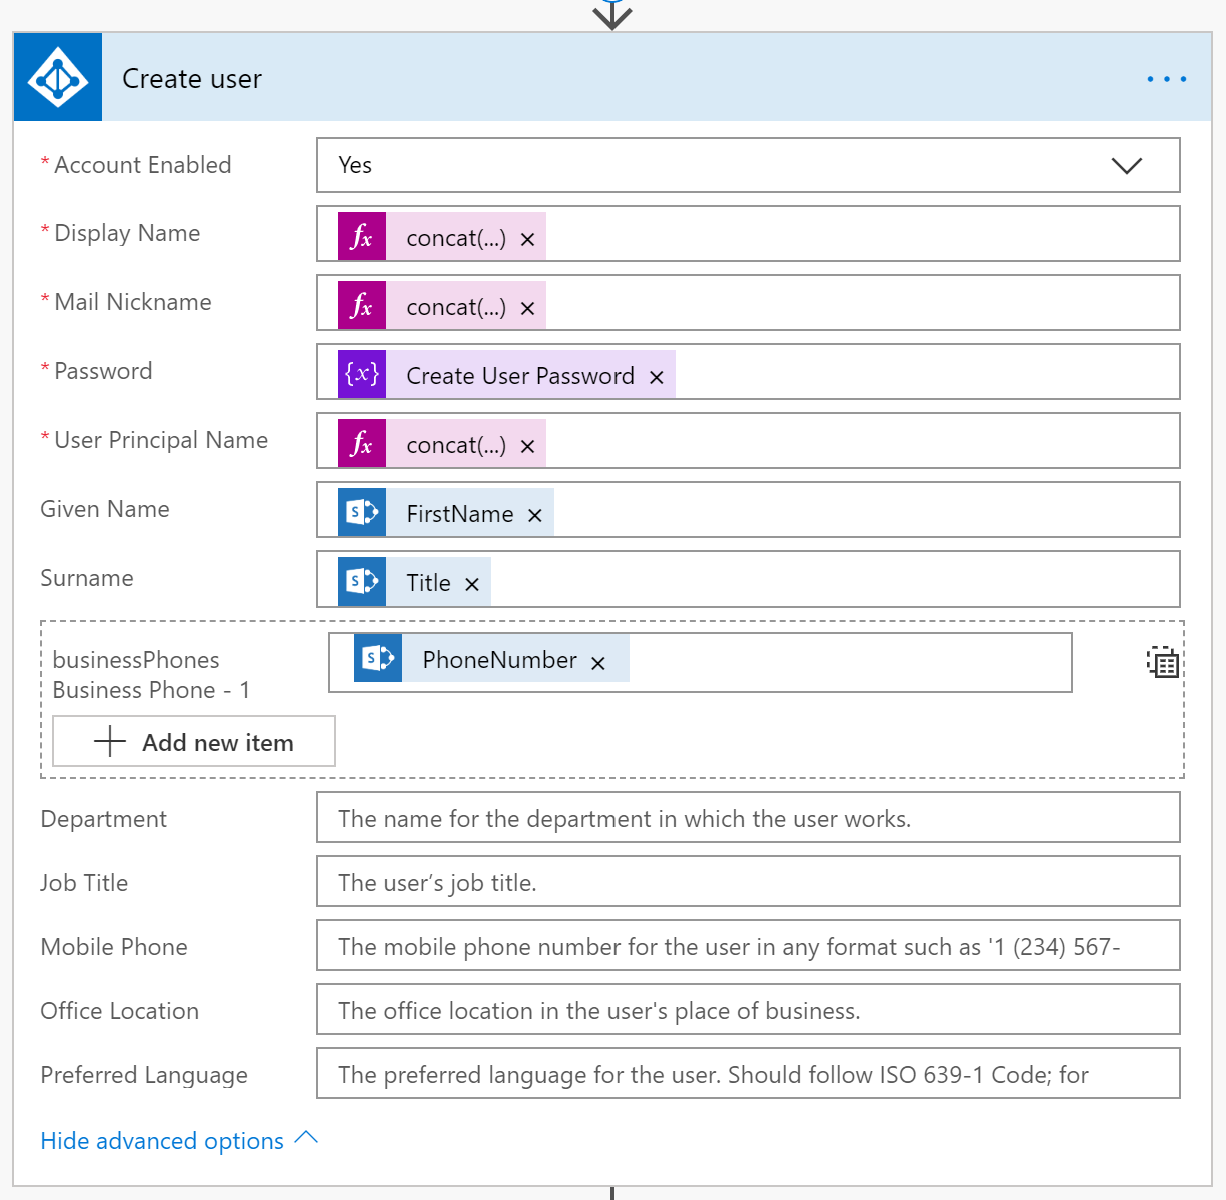 You will also notice that I’ve clicked on the Show advanced options and updated the Business Phone, Department, Job Title, Mobile Phone, Office Location, and Preferred Language.
Account creation will fail if Preferred Language does not meet the specific format. Business Phone can be an empty array, but cannot accept a null value.
eg. [] - ok
[null] - failure
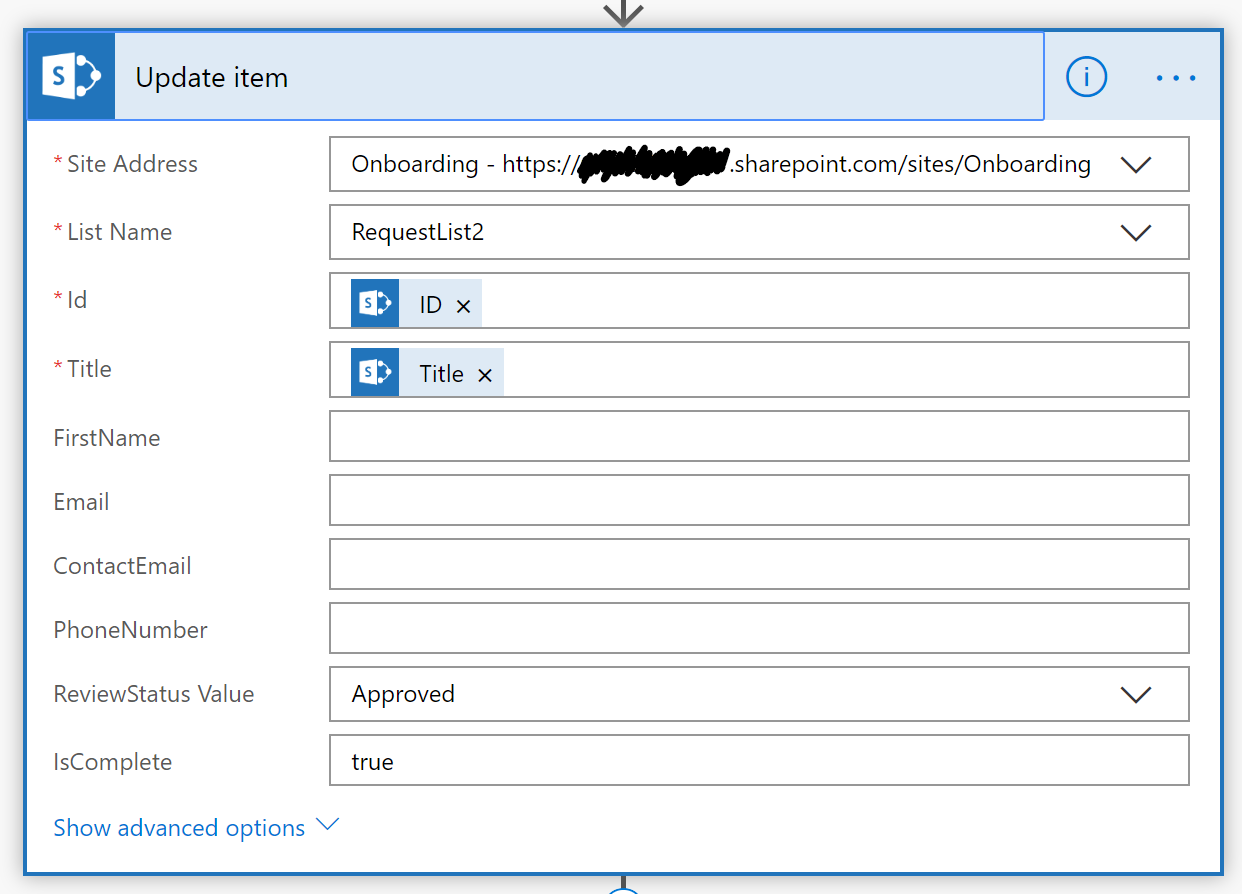
Next, update the Update item action to set the current item’s ReviewStatus value to Approved. You will also notice the IsComplete field with a value of true, this field needs to be added to your SharePoint list or else the Update item action will fail.
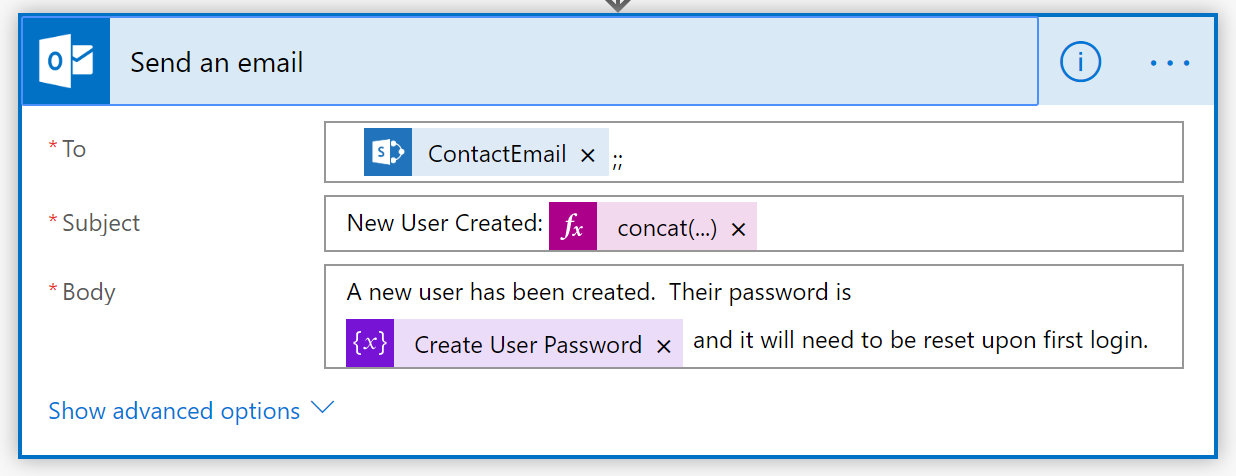
Finally, update the Send an email action to utilize the values captured from the list.
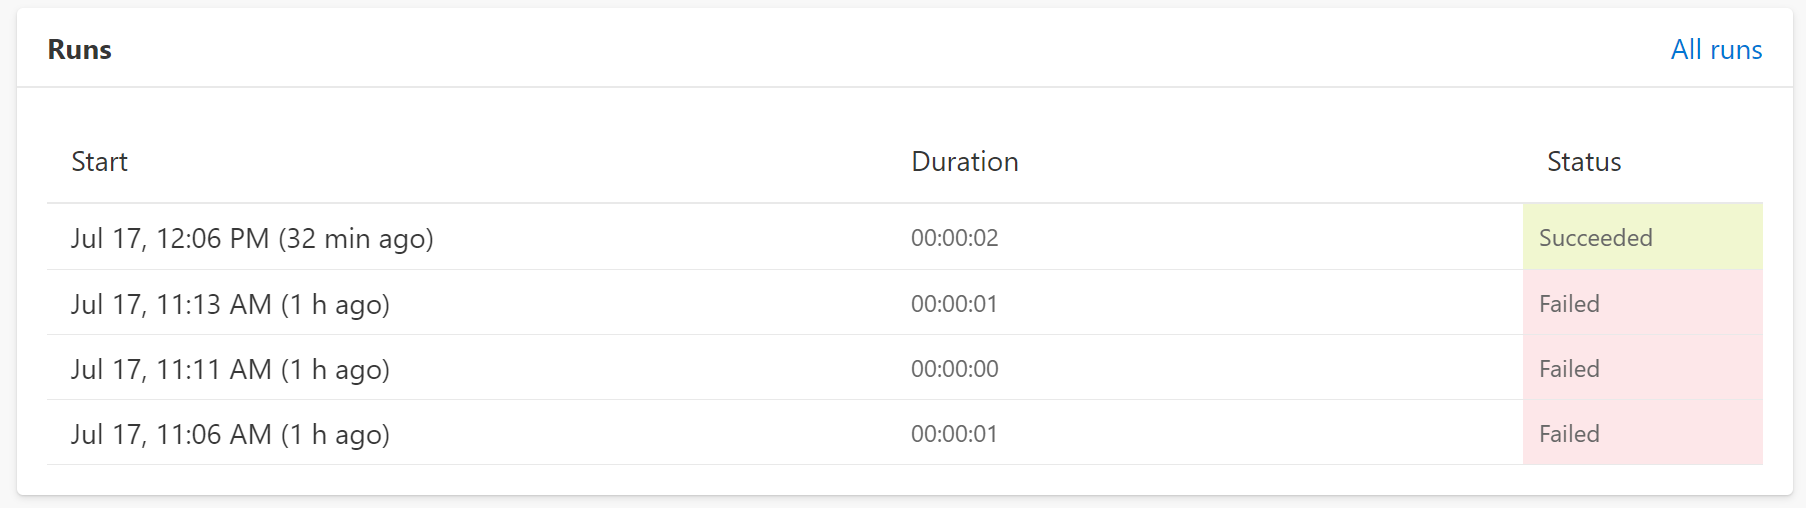
Now you should be able to test you Flow by creating an item in the SharePoint list and observe the execution of your flow, and if there are errors then you can perform troubleshooting and resubmit.
Add the Review
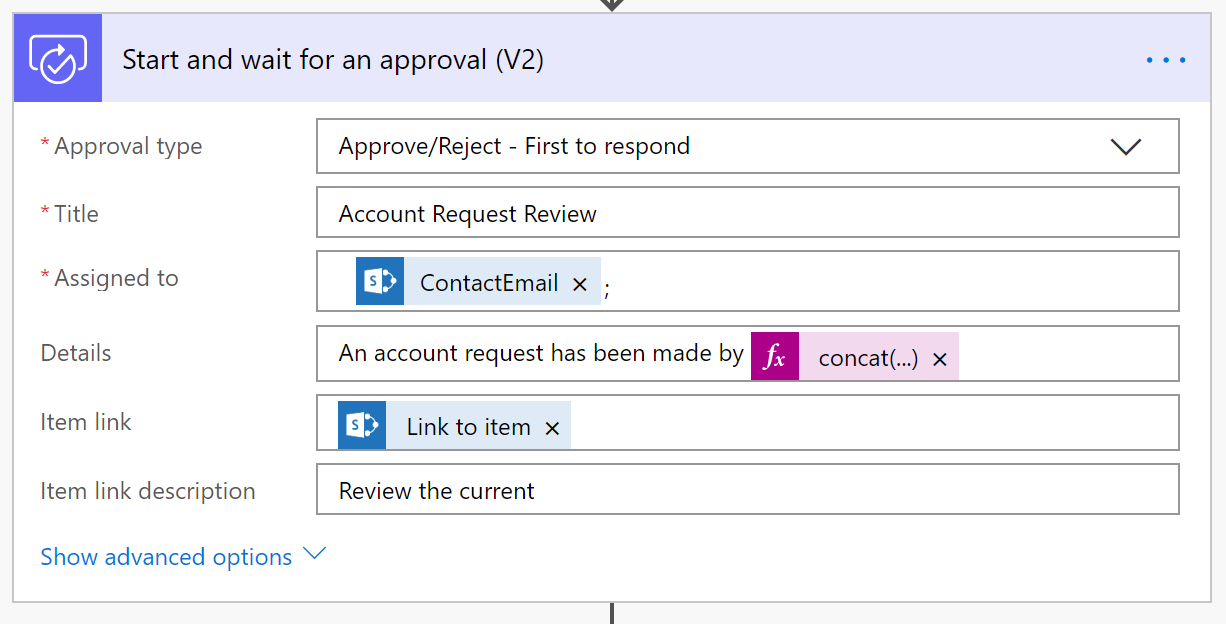
Now that the creation process is working update the flow to include the actual review phase and condition handling.Add the Start and wait for an approval (v2) action to your flow AFTER the Initialize variable step and configure it as shown.
The Initialize Variable cannot happen within the Condition portion of the workflow, so you may as well initialize this immediately after the flow starts.
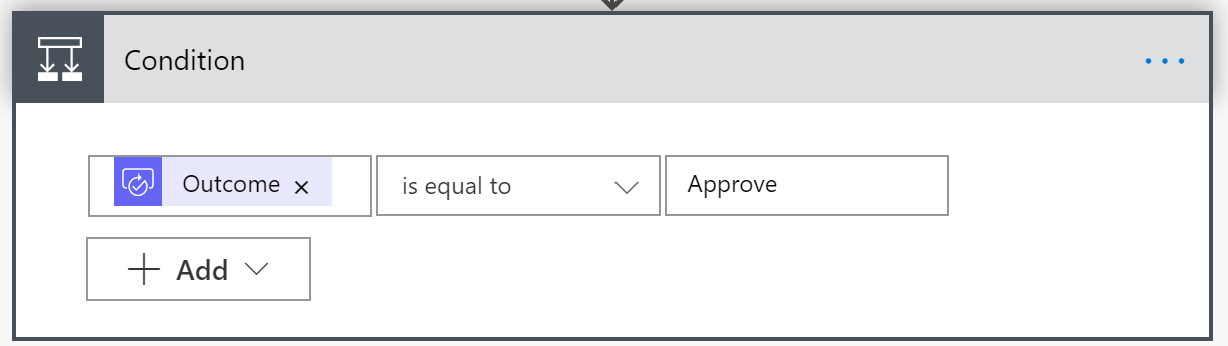
Next, add a Condition action to your flow. Update the Condition to use the Outcome of the Start and wait for an approval outcome to be equal to ‘Approve’.
Finally, move (yes drag and drop does work) the Create User, Update Item, and Send an email actions into the If yes segment of the workflow. You should alsoadd a Send an email to the If no segment of the workflow and send the user a notification that their request has been rejected.

I recommend testing again to make sure your approval process works as expected, and be sure to test both the Approve and Reject.
Collect Requests with Forms
Now that our flow works we need to set up a way for people to submit requests to be reviewed and approved/rejected. Microsoft Forms is a simple way to create the request form you need and allow it to be shared outside of your organization.
Creating a Form is really easy so I won’t provide the full details, but create a new Form that captures the same information that the SharePoint list stores. Don’t include the workflow type fields like_Approval status_ and IsComplete field of course. Here is an example of the Form I created.
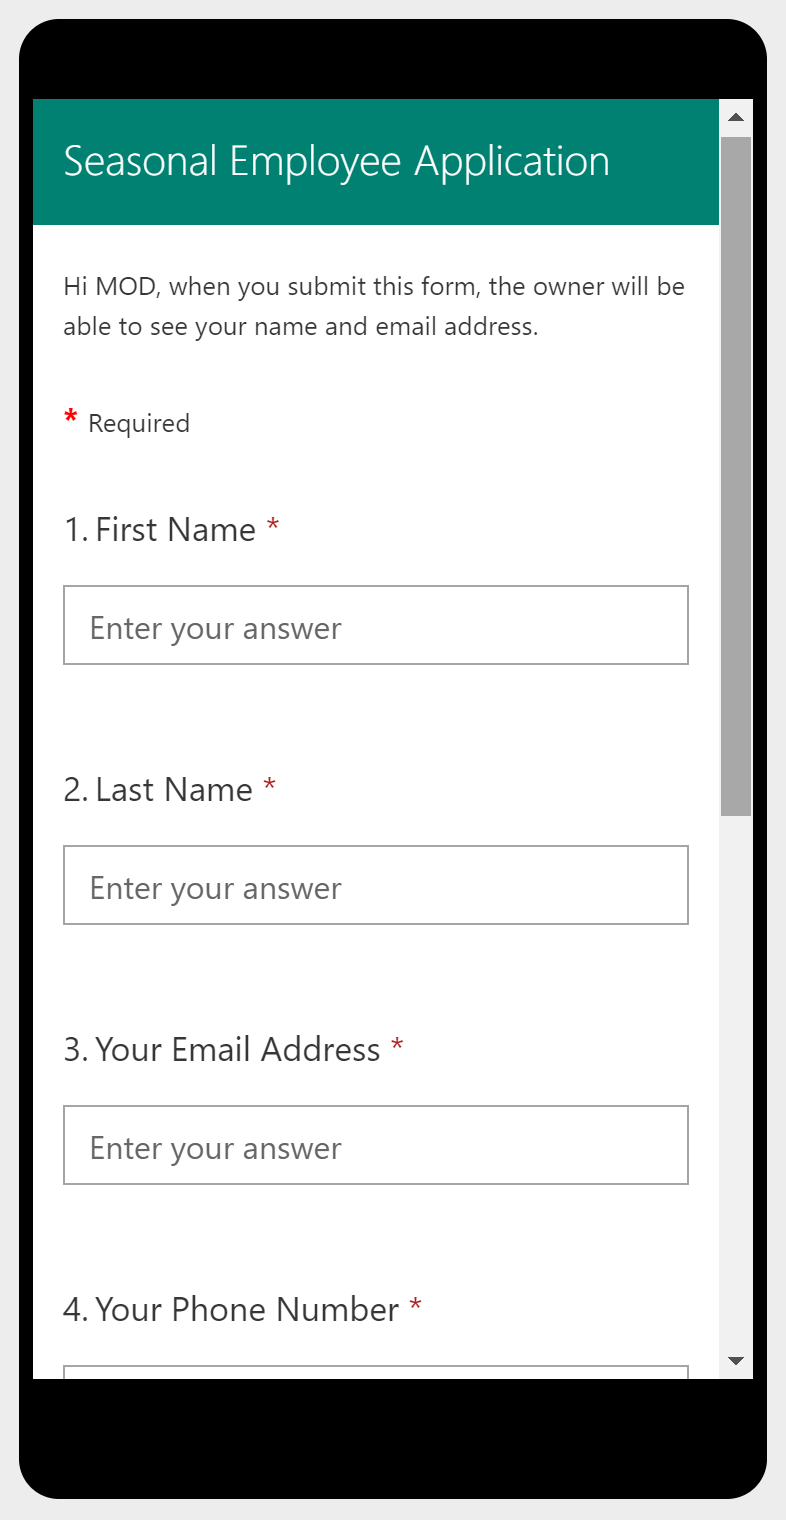
As you can see I provided friendly names for each of the user input fields and marked everything as required.
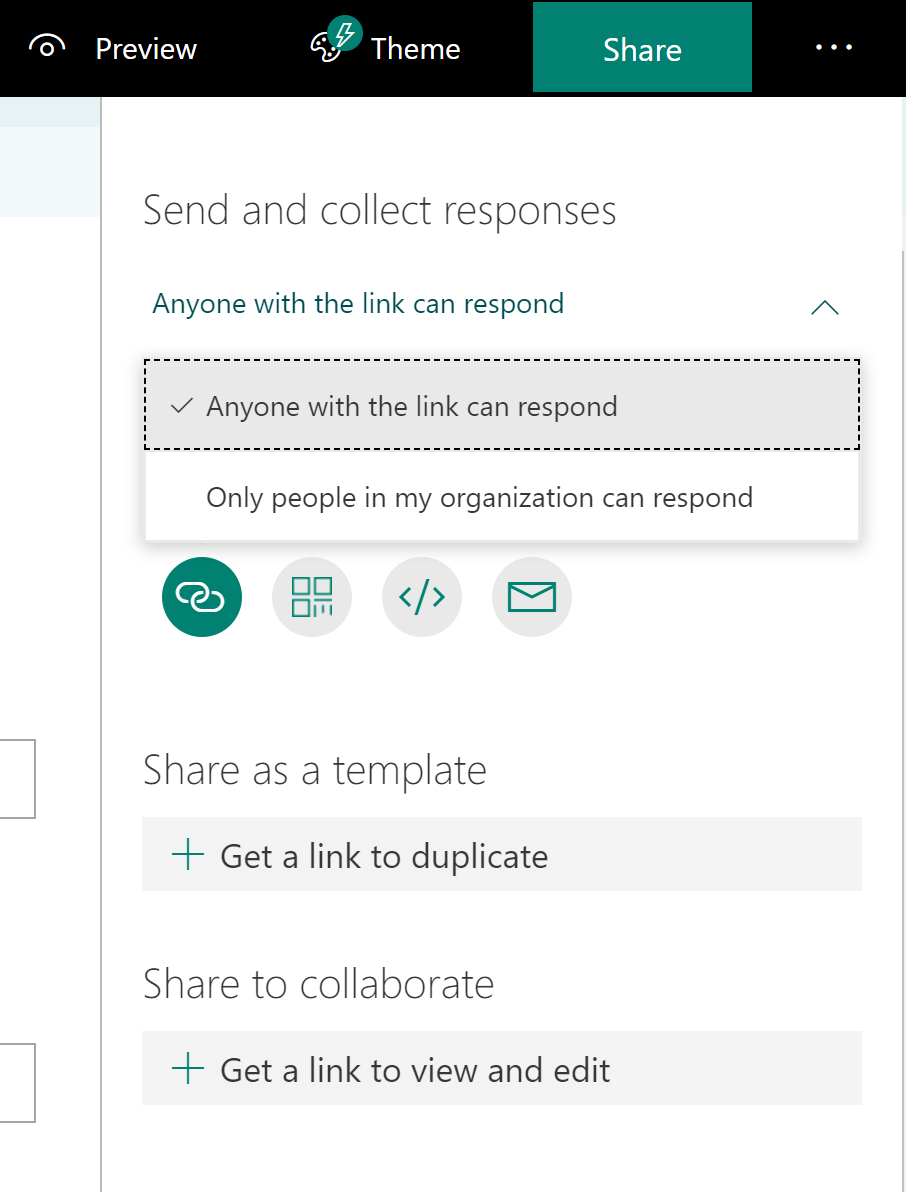
Now you need to allow this Form to be accessed by anyone with the link. To do this click on the Share button in the upper right of the browser window and select the Anyone with the link can respond. This will allow you to copy the URL and send it to any external participants.
Tie this all together
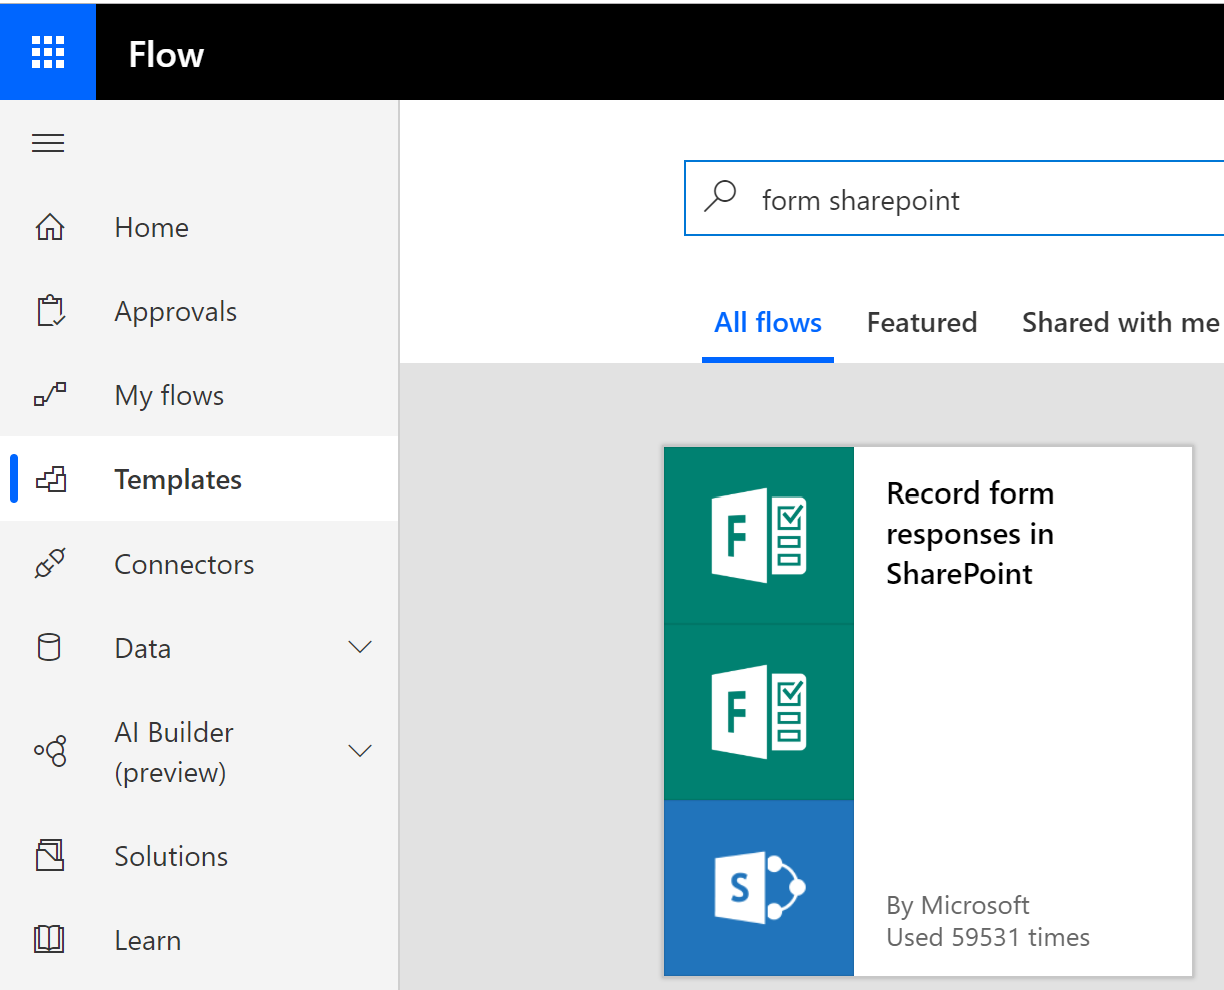
The final part is to pull our Form submission into our SharePoint list, and again we go back to Flow for this and use an existing Template.
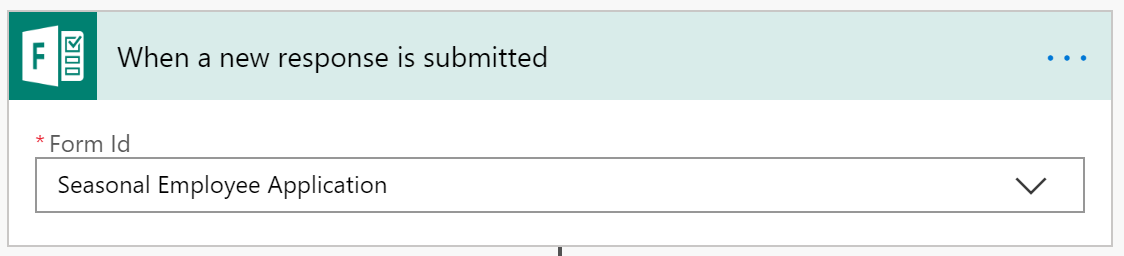
After creating the new Flow from the Template you need to customize the When a new response is submitted Action and select the form you just created.
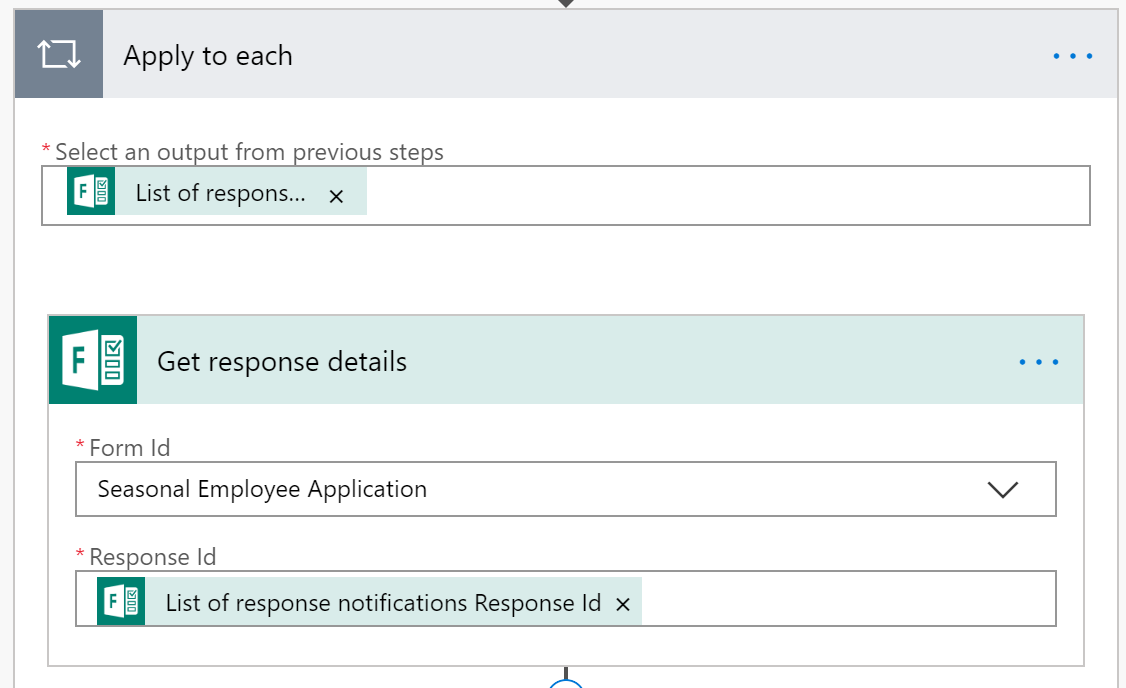
In the Apply to each action update the Get response details and select the form you created.
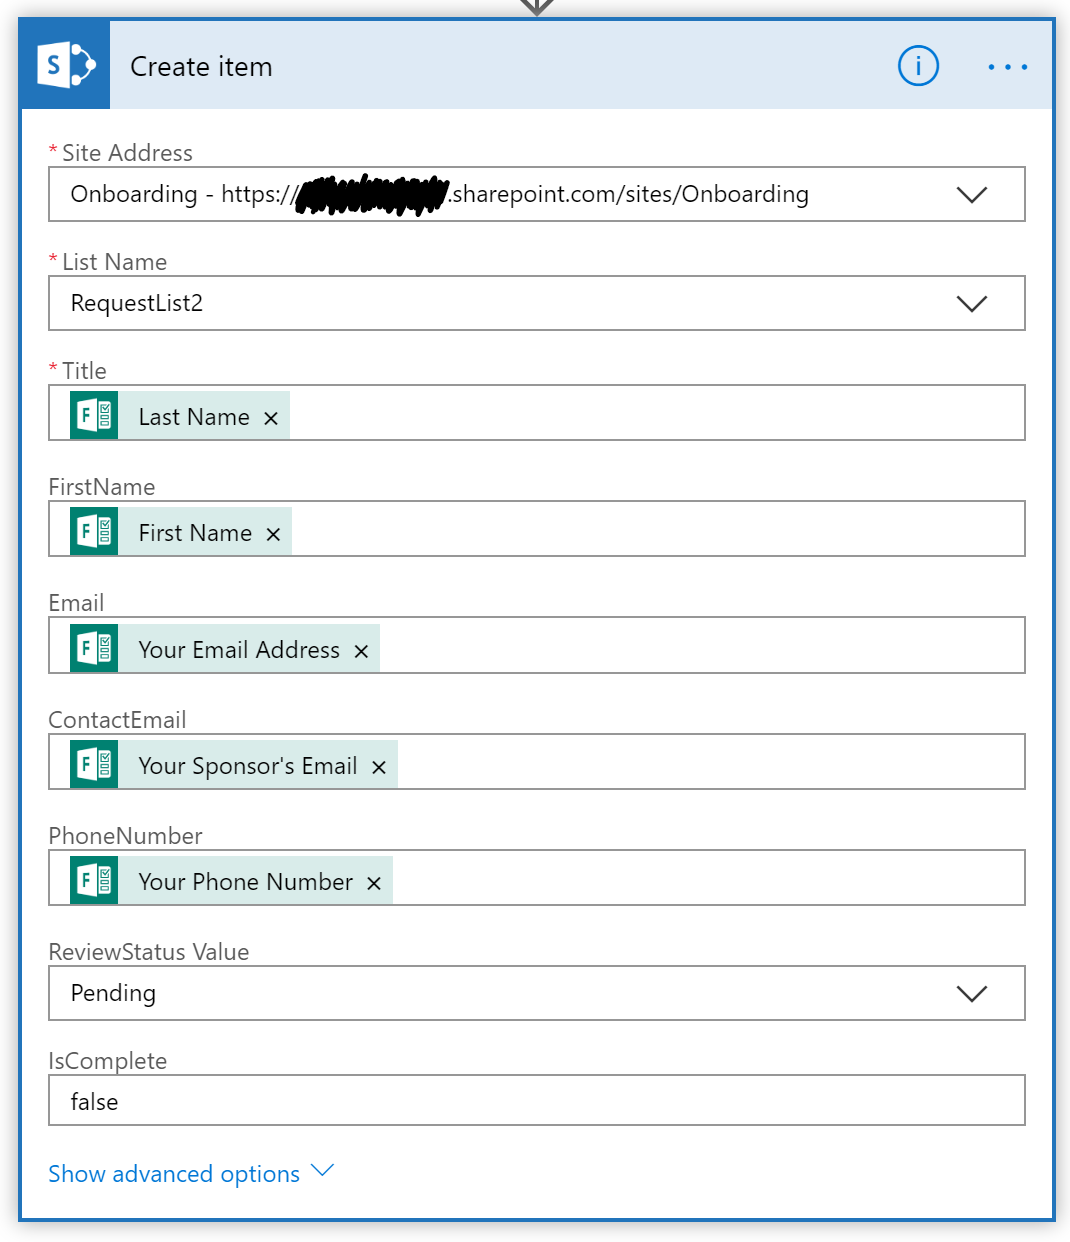
Finally, update the Create item by selecting the Site Address and List Name, then expand the Advanced Options so that all the fields from your list display.
Save your flow, and go test your solution from Flow to Account Creation.
Wrapping Up
You should now be able to share your Form with people outside of your organization, have them submit the form, record the entry in SharePoint and have the Approval process kick off and the account creation be performed.
There are lots of Flow templates and clearly the Approval process doesn’t specifically require SharePoint to store the item, so there are probably hundreds of ways to approach this problem. However, I like this method because I can see the data move from Forms to SharePoint to Azure AD and creating tracking and report solutions are easy.